Monday, November 21, 2011

SHOWER FINISH

I’m always so surprised when I talk to builders and architects about shower stucco. It seems it is very hard to find and not widely known. Shower Finish was first made many years ago as a substrate for tile or in locker rooms and industrial kitchens. It was an effective way of stopping water; the concept was to have a durable waterproof material to paint or tile over.  Through the years people have found the product on our website and it is now most common as a “finished product”. I think people are tired of cleaning ugly grout in tile, and marble and granite are very expensive. With the resurgence of contemporary and “loft style” homes in the city the cement look inside has gotten very popular. Of course, some people add color to shower finish to match existing counter tops and décor. Super Shower Finish is a polymerized cementitious coating that can go over scratch and brown (typical underlayment for tile). It can also be easily retrofitted to make a bath into a shower or just upgrade existing. As with any other cement product there needs to be some suction for bond. A base coat over a cement board is typical and works well. When I did my daughters house we screwed Durock (USG) to the studs (3x5 sheets at 3/8 or ½ inch thick) and meshed the joints (2 inch drywall mesh works fine). Then a base coat of a polymer modified cement for extra strength (like Merlex Basex) and then two coats of Super Shower Finish. This is typically troweled smooth. The material can be carried out into the entire bathroom if desired. Be advised that when the material is wet you can see streaks as the water tends to absorb a small way by not evenly. When it dries it gets pretty consistent again. Also, as any other smooth cement based stucco expect some color mottling and variation. Of course, this is what most people want.


Any cement material is extremely high Ph so it is a natural biocide. Soap scum doesn’t build up and it’s as easy to clean as any smooth material. There are no joints or areas that require scrubbing. People often ask if a sealer is recommended over the Super Shower Finish. I actually tried that myself just to make sure it was water tight. I used MicroSeal II but couldn’t get it to go in. The answer is: “if it makes you feel better to seal it go ahead”. It works just fine without it.

I am convinced that if more people knew about this it would be used extensively. The material lasts for decades and is virtually maintenance free. Color is open to the imagination as some people add multiple “blend over” colors and get real creative. There are bathrooms that are now part of the “outside” that are carried into a private garden or courtyard. This works great as it can match the existing exterior stucco seamlessly. Design professionals and architects are really excited about using this product and I have been working with some designers in New York that just love it. It certainly is a different look so be sure it’s what you want. Most people do their own color. Although, Merlex will make matches and provide the color as well. It is highly recommended to experiment with the color and get the approval of the customer by using a mock-up before proceeding.

There is a frequently asked questions technical sheet at the Merlex site so if you’re interested in this product look at the Technical Data Sheet on Super Shower Finish and the FAQ.

Good Luck!!!


Monday, October 31, 2011

What’s Philosophy Got to Do with Construction?

 I recently visited the Green Idea House in Hermosa Beach (http://www.greenideahouse.com/), which will be a beautiful contemporary custom home that is net zero energy.  There are several categories of zero-energy houses, but this one is “net zero”, meaning that balanced out through the year, the home will use no more energy than it generates.  It may draw off the grid during peak times, but will return that much and more back to the grid over the course of the year.

To get to “net zero”, they are building a tight building envelope with energy-efficient windows, blown-in cellulose insulation, an efficient heat pump water heater, and plenty of PV cells on the roof.  This would be enough to make the project remarkable in this region.  But these homeowners have taken the project much farther, to the point of making it an intellectual and philosophical challenge.

The Fortunatos, owners of the home, are blogging about the experience of building their home this way.  Perhaps because of the full disclosure of every decision they make, they are taking the time to dig deeply into the pros and cons of each design decision and material choice. They would like to help others think about how decisions they make for their home should be dictated by their specific lifestyle. And there are some eye-opening conclusions on their website for you to consider in building your own home.

For instance, installing tankless water heaters and solar thermal panels has become a common practice in green home building.  Instead, the family chose a multi-tank solution that first pre-conditions the city water to ambient temperature, which at the beach is quite often 75 degrees, a savings of 20 degrees worth of energy use.  Then they utilize a new technology heat pump that has efficiencies far in excess of traditional gas burners used in tank and tankless heaters.  While tankless water heaters have widespread advantages in certain situations, there are no one-size-fits-all solutions in green building.  The owners thought about water heating in terms of how best to support their lifestyle and generate return on investment; in their case – 3 people who are often out of town travelling – a solar thermal system and tankless water heater were not the answer.

The building design also takes into account orientation to the sun to keep sun out in cooling periods and welcome it in during heating periods.  The southern exposure is the culmination of this philosophical debate.  Using quantitative models, they arrived at a 5-foot overhang over the windows on the front of the house, carefully calculated to shade the building from the sun in summer (high up in the sky) and to allow the sun to heat a thermal mass wall in the master bedroom during winter (when the sun is low in the sky).  Decisions like this can save significant amounts of energy, and are modeled by Energy Soft when an energy consultant evaluates a project.  Every window is entered into the model with a specific compass orientation and overhang dimensions, so that passive energy use can be considered.

The homeowners are also looking deeply into the insulation design on their project.  Once the solar arrays had been specified and they knew the energy their home would produce, they could design the building envelope to release only a known amount of energy.  They settled on blown-in cellulose insulation between the framing members (many of which are reused 2x4s), for an R-value of about 13.  Rather than install foam on the exterior of the framing, commonly known as Continuous Insulation or CI, they determined that vapor permeability of wall systems is a desirable feature for air quality and mold resistance.  Their search for an energy efficient alternative to foam insulation led them to fiber board, a natural vapor-permeable material that adds an R-value of 2.6 for every inch of thickness.  Together with the blown-in insulation, their wall systems achieve an insulation value sufficient to realize their goal of “net zero”, together with all the other good decisions they have made throughout the house.

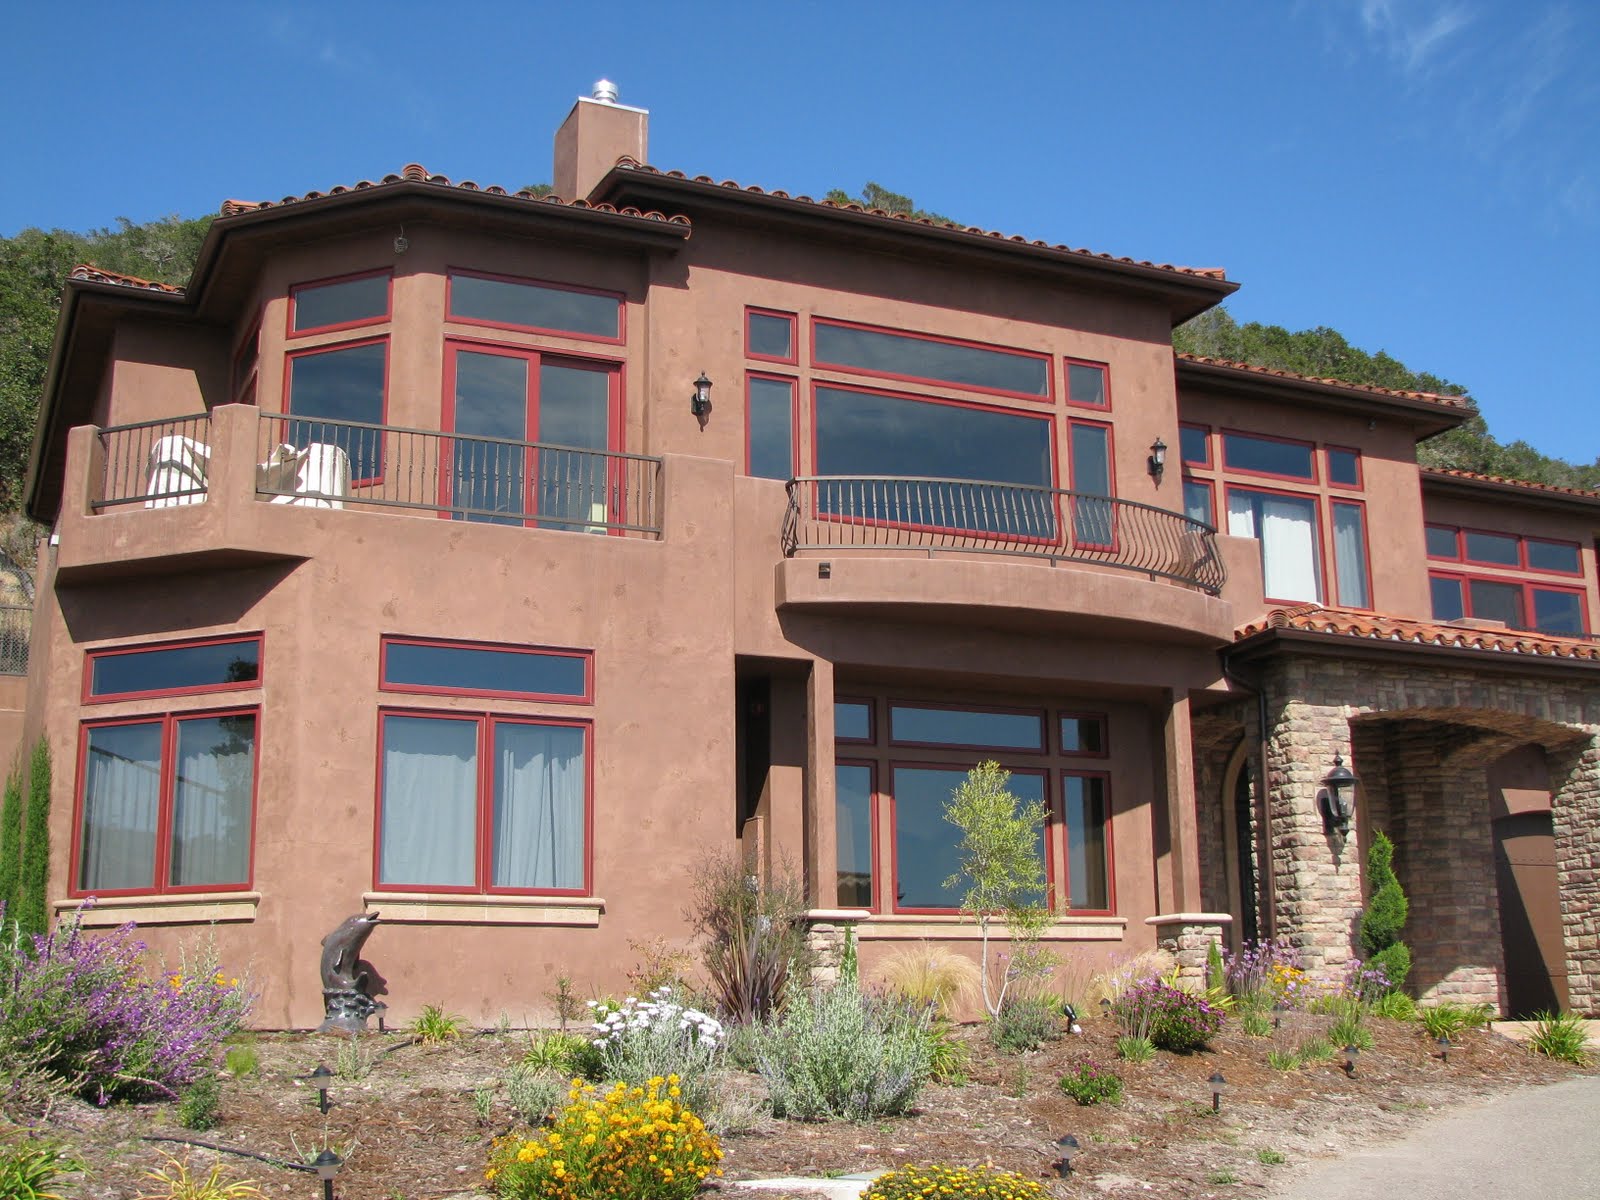
Next they had to choose an exterior cladding system that is attractive and protects the building from the elements.  They determined early on that they wanted to incorporate recycled content into their project, while minimizing embodied energy (the energy used to produce the materials in their home) and minimizing energy loss through the walls.  They are using metal panels on parts of the building, and plaster elsewhere.  The plaster will incorporate recycled content from locally-sourced recycled concrete aggregate and flyash.  The flyash question is a debate in and of itself, with questions of heavy metals, coal-fired power plants, and long-term maintenance to consider.  As with every other decision on the house, the Fortunatos considered all the angles in deciding whether to use materials that incorporate flyash and divert it from landfills.

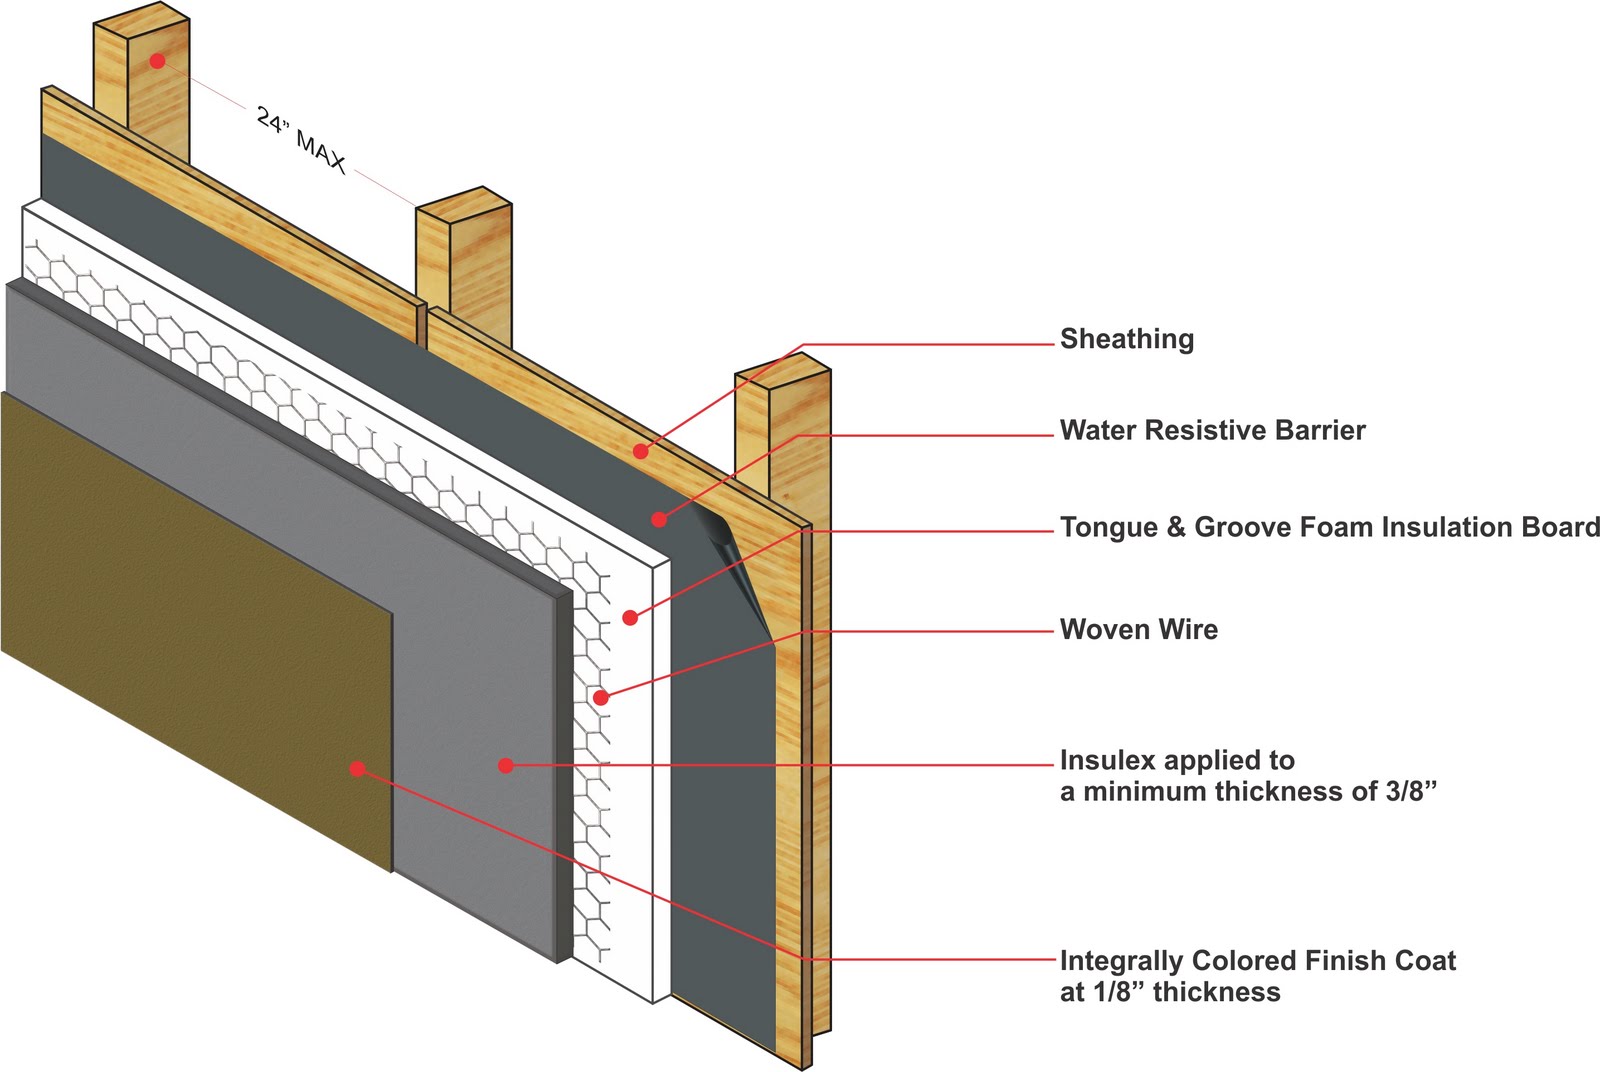
Build Smart Group advised the owners on plaster material decisions, including fiber-reinforced base coats with recycled content, color coat stucco finishes based on recycled aggregates, and lime plasters with lower embodied energy than cement-based alternatives (and stunning good looks).  Merlex Stucco’s website is a good source of inspiration in this area http://www.merlex.com/sustainable_stucco_how_to.htm.
 Interior surfaces will take indoor air quality into account, which is one of the easiest areas to build green today, thanks to the tireless R&D work by the nation’s paint companies.  Plaster products can also produce zero VOC performance with added aesthetics, and some even claim to actively clean the air.  Indoor climate control was also a consideration that led to selection of National Gypsum’s brand new phase change drywall.  These drywall panels contain tiny wax beads that change phases right around room temperature.  During the daytime, the encapsulated wax material melts, which absorbs heat from the indoor space.  As the liquid cools down along with the house in the evening, the wax returns to solid form and releases heat.  In this manner, the phase-change materials of PCMs act to regulate room temperature and reduce heating and cooling load on the HVAC system.  The Green Idea House calculates that master bedroom energy use will be cut in half through the use of these PCM drywall panels!

This project should serve as an inspiration to all green-minded homeowners to carefully consider how their new home fits their lifestyle.  Rather than leaving the key decisions up to design professionals working in a vacuum, owners should fully inform their design teams of their values and lifestyle and what green means to them.  After all, for those blessed with the resources to create the home of their dreams, a home should say “This is our home.  This is who we are.”

Merlex Stucco is continually improving its product line of natural stucco products to add products offering (1) energy efficiency; (2) recycled content; (3) local sourcing; and (4) reduced embodied energy. Products to be included on the Green Idea House Case Study include 33% Recycled Stucco (based on recycled concrete aggregate), and Vero Antiqua lime plaster (from Merlex's Vero Venetian plaster subsidiary), which has 28% lower embodied energy than cement stucco and incorporates 65% recycled marble aggregate. Merlex & Vero are pleased to support the Fortunatos, who are kindred spirits in their quest to find the most sustainable choices in products that fit their lifestyle.


Tuesday, October 18, 2011

BONDERS

There are three main types of glues used in the construction industry. Concrete Glues (Poly Vinyl Acetates), high end bonding agents (Ethyl Vinyl Acetates), and Acrylics. I am convinced these products are used interchangeably and incorrectly most of the time. I have seen contractors putting acrylics on the wall to bond mud or stucco. I have seen them pour Concrete glue in the mixer to modify the mix and add strength. These guys have been using these products wrong for so long that they are convinced they are right! I have called these guys on this many times and the reaction is the same: “I have been doing this for 20 years”! My gut is that this actually does work to some degree. The logical conclusion is that these are all glues and would react whether in the mix or on the wall. However, there is a right way to do things. Acrylics are always admixtures. They modify and strengthen the material they are added to. Acrylics allow the cement in brown coat, stucco, thin set, or any other cement based product to cure longer and therefore denser. The closer (denser) the molecules the harder (higher Psi) and also the better water resistance you will get. Acrylic admixtures can react differently depending on the weather. Guys used to tell me they didn’t like using acrylics because they “spike” the mud. That is, make it set-up more quickly. My teacher told me it made the material cure longer and therefore stronger and better. So which is it? I called my guru and he said the answer is both! When the weather is over about 85°F to 90°F acrylics can set the material more quickly. This is why we recommend using PVA or EVA on the wall instead. The other truth about acrylics is that the price difference between them has to do with percentage of solids. Some companies add more water than others. So it holds true here that “you get what you pay for”. Some very inexpensive acrylics probably have solids in the low teens and the good ones like Merlex Acrylex are in the high 20% to low 30%. This can be triple the amount of actual chemical that does the job!

PVA’s and EVA’s are another source of confusion. These always go on the receiving surface. They are used on the wall if there is a “bond issue”. That is, if there is something on the wall that inhibits suction. Suction is what causes subsequent material to bond to the last material. As in stucco to brown coat or stucco over stucco. So if there is a bond-breaker like paint, sealers, oil, dirt, synthetic stucco, or any other material that inhibits bond then glue should be applied to the surface. The two main characteristic differences are PVA’s re-emulsify. This means they can become a liquid again after drying. That can be good if you are coming back later to apply the coating or it can be bad if you apply the coating and it rains and the coating slides off the wall! EVA’s do not re-emulsify and are best to use if there is any chance of rain or moisture within 72 hours. Again these chemicals are cut with water and the percentage of solids can be very low. Be careful of inexpensive glues and best to trust name brands. Contractors seem to love Weld-Crete®. It is a great product and very high in solids. Weld-Crete is a PVA and will re-emulsify. Mighty Bond from Merlex is a high solid PVA and the price is in the mid range. Merlex also makes an EVA called Superhold that is the best bonder on the market. It has a blue tint to it so you can see where it is (or isn’t) on the wall. It is towards the high end in price but is high in solids and is the right chemical to use outside.
Soka University - Laguna Niguel, CA

So what is the answer? Is it best to use acrylic in the mix to insure bond or put an EVA on the wall or both? The answer is both. The acrylic in the mix will stick to the EVA on the wall for a chemical bond in lieu of a suction bond. You can get away with either but the acrylic must be dispersed properly in the mix, and the bonding agent must be on every square inch of the wall to bond. With both materials there is that much greater probability for success.

I hope that this can help clear up the use (mis-use) of bonding agents in the field. Reality is that whomever reading this is NOT the plastering contractor. More likely it is a homeowner that will have the onerous task of telling the stucco guy his job…. This never seems to go well!

Friday, August 5, 2011

STUCCO COLORS AND PIGMENT LOADING

There is always quite a stir over colors in stucco. The designers, architects and owners want the colors that will make the project sell more quickly, add appeal, match existing schemes and make an aesthetically beautiful project. The contractor warns that heavily pigmented colors are expensive, troublesome and susceptible to problems. What is the answer? It is of course complicated and pros and cons must be weighed. Let’s start with the most asked questions about stucco and color:

1.       Pigments are expensive and when you get over a pound the price goes up? This is true. Typically manufacturers allow one pound of pigment in a sack of stucco with no extra charge. Blue and Green are the exception as they are more expensive colors. Pigment is by far the highest cost raw material in stucco by weight. When custom homes want that rich earth tone with four pounds of color it can be as much as twenty dollars extra per sack. Remember though, if we are talking about a high end custom home then the homeowner should get what they want for an exterior color. A very large custom home might use 100 sacks of stucco and even at 20 dollars this is only 2000 dollars more.

2.       The contractor says he has a hard time making stucco even and consistent with heavily pigmented colors? This also is true. However keep in mind what texture is wanted. A lace texture or sand finish is very unsightly with mottled color. In this case the wall would certainly have to be fogged to even out the color. In smooth finish applications color mottling is typically required. With darker colors we see movement and character in the stucco. It becomes a benefit and part of the artistic beauty of the finish.

 
Manhattan Beach, CA -  PP-5113


3.       Are some colors so dark that fog coat cannot be produced for that color? This is a common assumption and most stucco manufacturer s have specified limits to making fog coat with over 4lbs of pigment. The reason is that fog-coat comes in a 25lb bag. If there are 5 lbs of color in the bag that constitutes 20% of the bag by weight. We cannot take that much cement and other ingredients out of the bag to accommodate this much color. Similarly, we cannot produce heavily pigmented pre-mix stucco for the same reason. We never want to put so much color in the bag that it threatens the integrity of the product. We should be able to produce fogcoat that can even out color variances using dark pigments. The solution then is to make fog-coat in base and color and let the contractor mix it in the field.

4.       Are colors more “problematic” when they are dark? Yes, stucco is certainly not paint. It is not logical to expect stucco to react as paint does. Weather plays a huge part in how stucco looks and the more pigment involved the more the weather and other variables can affect color. Efflorescence is more noticeable in darker colors. It is not because there is a higher presence of salts,  it is that salts are white by nature and show much more on darker walls.


5.       My contractor has asked me not to use the dark color I want for my home. What should I do? It is your home and being the owner or builder you should have what you want. But… Go in with your eyes open! He doesn’t want to do it because he has experience that there are many things that can go wrong and he knows that he will be blamed for the problems. My advice is to:

a.      Always do a mock-up and agree on the color before starting the job.

b.      Discuss mottling, efflorescence, extra cost and find the tolerances and expectations of both parties and put it in writing!

c.       Discuss what to do in the event of freak storms, repairs resulting from damage by other trades and who will pay for these issues.

d.      Weigh the pros and cons very carefully when choosing color.

Remember, stucco is by nature a natural product. All the raw materials are from the earth and it is almost always hand applied. This is the beauty of the product. We don’t have to re-do it every few years like paint. Stucco has an extremely long life cycle. So like any natural product or handmade material certain allowances must be made for the very nature of the product. Life is a give and take so go for that dark color on a smooth wall! Enjoy the beauty of the staining and mottling the same way you would admire your handmade antiques with all of their beautiful imperfections!
The Renaissance - Uptown Orange, CA

Pismo Beach, CA - PP-2279 and 3/4P-1710-2
Shady Canyon, CA - P-5004-2, P-778

Monday, June 13, 2011

VARIATIONS IN SMOOTH FINISH

Sometimes architecture calls for variations in the finish of steel troweled stucco. There is hump and bump”, “cat-faces and differing degrees of imperfections like trowel ridges, burns and mottling. It is important to use these variations correctly. I am convinced that by the time the actual applicator is doing these finishes he has no idea why he is doing it that way. The concept may come from the owner or architect. It may be an early California or Mission Finish. “Hump and bump “is a look that has impressions and protrusions in the wall. This is actually done in the brown coat as it takes many coats to build up the humps in the wall. This look is supposed to replicate plaster being applied many times over decades. Therefore, it is critical the architecture be historic and not modern. The job should also not be painted. Cat-faces are the small voids that are left open between the first and second coats of smooth stucco. They should be irregular in shape and random. This look is supposed to show stucco so old and from local materials that they fall off the wall over time. Sometimes brick is applied on the corners to show how the stucco has fallen off the original brick substrate. Again, if these voids are consistent and not placed randomly it looks terrible. As in most construction problems the issue comes from poor communication. The architect and owner agree on a certain look and should describe it properly and ask for a mock-up in the construction documents. The general contractor should insure the plastering contractor understands what is required and properly conveys this to his applicators. This is a long chain to describe a possible story about an “early California” look. It some cases the owner is calling for a job the applicator deems to be imperfect and below his skill level. Therefore a large mock-up should be mandatory if either of these alterations is desired. I would encourage architects and owners to not use these textures unless there is a willingness to be diligent in overseeing this process.

Hump and Bump Finish

Catface Finish

If we have learned anything from our friends in Italy it is to let nature take its course. When they show samples of plasters they are fairly even and consistent.  They know that time will take care of the look that is desired. We want to use trowel burns and friction to replicate the aging process to make it look old when the project is just completed. It is certainly more natural if we let time take over and let our natural products age, crack, mottle and do all the things that finishes do in Venice, Tuscany and other historic places to show the enduring beauty of natural cement and lime stuccoes.

Old World Finish


Monday, April 11, 2011

Continuous Insulation System

The new Title 24 rules for higher energy efficiency in homes and buildings will have builders scrambling to find cost effective means of reaching these new values. There are 16 different climate zones that have different requirements but any building with steel studs will be affected as a result of “thermal bridging”. This is the transference of energy from inside the structure to out through the more dense material.  In many climate zones the home builder will have to find ways to better insulate their homes and at the same time stay competitive and give the potential home buyer more home for less money so the banks will loan money for them. One way to do this is using foam on the entire outside of the home. This was called “one-coat” Stucco in the 1980’s but is now referred to as “continuous insulation systems”. This system uses a different wire over the foam sheets that is slightly thinner and has less “furring” to hold less material or cement in the wire. Typical 3 coat systems have 7/8 inch of material to make up the wall where “CI” systems use about a ½”. The foam not only helps insulate the house but serves as another barrier to water intrusion. The foam absorbs some movement and therefore it could be argued that cracking would be lessened. This is probably how the home builder is going to address the increased requirements in the future as the other solutions can be quite expensive. They can add solar panels; use more energy efficient doors and windows. They can use better HVAC systems (heating and air conditioning).  However these methods are more costly. The one thing that the consumer must be aware however is the potential for a soft wall or increased cracking because of overloading of sand in the Cement Product. The manufacturers produce these products as concentrates and the plastering contractor uses sand that is brought to the job-site separately. Sand is less expensive than the one-coat concentrate so more sand added saves money. The issue then is how to control how much sand goes into each sack of material and ultimately on our homes. The more stringent waste water and run-off requirements may solve this problem for us. The State of California is becoming more stringent in dictating what goes into our storm drains and run-off. Job sites are now required to have catch basins for cement effluent and piles of sand are increasingly not allowed because of what they add to waste run-off. Pre-sanded products will more than likely be required and will start in communities that have more stringent rules regarding raw materials set ups. Manufacturers’ can use the proper amounts of sand in their products as well as the right type and purity of material. This also can reduce cracking and make sure the strength of the wall is maximized. Other markets such as Las Vegas, Phoenix and Central California have utilized this method of building for many years. I think that with proper controls we can adopt this method in Southern California without the litigation that some of these other markets have been subject to.


Monday, March 7, 2011

Cement And Natural Materials

A few years ago we heard of “Feng Shui”. This is the eastern philosophy that things must be aligned in a certain manner to be pleasing and comfortable. I think that natural materials and colors used in nature make us feel more comfortable and create spaces and structures that are most pleasing to the senses. Cement, lime, stone, and masonry are basic materials “from the earth”. I believe the use of these building materials have become more popular over the last decade because of our developing knowledge that these products help our psyche. When I am asked about painting stucco I usually comment on vapor permeability and how paint can trap moisture. When stucco is painted it also shortens the product life cycle. Stucco can last many years with very little maintenance. When we paint stucco it only lasts as long as the paint. The other reason not to paint is due to aesthetics not functional. Since real stucco is made of sand, cement, lime, and natural iron oxide pigments our brain is more comfortable with the finish than paint, siding, or synthetics. When you think of it most natural products take less upkeep than synthetics by their very nature. I have also seen a trend towards natural colors in stucco. Deep rich hues are most desirable but the most popular colors are earth tones. Deep oranges and yellows, rust colors, and dark browns are most widely used on high end custom homes. Lime is also more often used now and I believe it is for the same reason. Lime was first used as a binder for building long before cement was discovered; mixed with volcanic ash lime would harden and was used in much of the building in ancient times. Lime is a wonderful material having incredible character as it cures and ages. Lime is slaked to make a workable material and then used in mortar and colored for use on interior and exterior walls and ceilings. Visit the Vero website, www.vero-rialto.com to read more on the lime process that enables this material to be so versatile. 
I believe that stucco was sort of thrusted on us by the building community because it was so inexpensive. However, with improvements in materials, basecoats, and workmanship we see smooth colored materials both cement and lime based being some of the most beautiful finishes available. It is fortunate that the most beautiful materials are also naturally made from abundant resources and with the right design intent can make our structures more beautiful and functional than ever.

Tuesday, February 8, 2011

Staining

Plaster and stucco are porous materials and therefore susceptible to staining. Stains come from anything that can leach into the plaster through moisture and water. The most common being the planters and dirt that we pile up against the bottom of our homes. Code dictates the bottom of the plaster (the termination screed) should be 4 inches above softscape (planter’s, dirt, the ground, etc.) and 2 inches above hardscape (brick paving, concrete, etc.). Moisture carries the dirt and organic material into the stucco. That is why you can’t clean the stucco; the staining is not on the surface it is in the material. Another common place for staining to occur is from decks and roofs particularly where there is no overhang or gutters to divert water from washing down onto the face of the stucco. The water again carries the dirt and is absorbed into the plaster. There are ways to prevent this: as mentioned, try to divert water away from the plaster walls. If there are planters right up against the house you can pull back the dirt and treat the bottom of the structure with a waterproofing product like Super Blockade. This is a cementitious product that lasts many years and prevents absorption of moisture. You can also seal the stucco with a good penetrating sealer like MicroSeal II. This chemical prevents moisture from going into the wall but still allows the wall to breath. Keep in mind, these long lasting sealers penetrate and will only protect the surface if they are built up to impregnate the pours all the way to the surface. The primary function of a penetrating sealer is to keep water out of the wall cavity. Most damage is done if water is allowed into the wall. Surface moisture is typically an aesthetic problem. Of course, over time, water will degrade the surface through efflorescence and delimitation. Since the problem is already present we should discuss how to solve it. Paint is not the answer as paint disrupts the vapor from leaving the wall and has to be re-applied regularly. Fog coat is the product that is supposed to be used for stucco. It is cement paint and can be spray applied to make the wall look new again. Following this process a sealer should be applied to keep the problem from re-occurring.


Microseal II application - Dublin City Hall     Dublin, CA

Tuesday, February 1, 2011

Shrinkage- the “other cracking”

The two types of stucco cracks are structural and shrinkage. The structural are the ones we see most because they are large and very common. Shrinkage cracks are the ones that look like a honey comb or spider web cracking on smooth coat stucco. These are typically so small they are not open and can’t be seen from more than five feet away. People still ask and worry that they will somehow degrade the finish over time. The problem is only aesthetic. They will actually lessen over time as the stucco cures and hydrates. I tell homeowners this is a typical condition and should be expected to some degree. Shrinkage cracks are caused by moisture or water leaving the stucco matrix thereby leaving small voids. They can be lessened by tooling the stucco on the last pass at the exact right time. As any cement based material begins to set up it needs to be troweled at the precise time that there is still some moisture in the material at the surface. Not enough moisture and the trowel will cause friction and “burn” the surface causing darker areas. Too much moisture and the surface will not close and be done. You can imagine how this may be easily done in the lab on a small panel of stucco. Think about how difficult this timing becomes on a building with multiple levels, elevations, ground conditions, and limited man power. Then add weather variations and you can see how hard it is to tool areas when the conditions are perfect. In hot, dry, or windy conditions the stucco will dry very quickly. The tradesman will carry a misting bottle to re-hydrate the surface to aid in finishing. On a cool, cloudy day, or on the north or shady side of a building it may take hours before the surface is ready for the final tooling. This is why a certain amount of shrinkage cracking can be expected and is not a problem. As homeowners we can do something to help this condition. Moist curing is the process of adding water to the under coats of cement and sand in the plaster process. This slows the curing process and makes a stronger wall. Typically the contractor will schedule moist curing for the scratch and brown coats but not the final color coat. This is because on the color coat improper moist curing can lead to color problems. That is, if more water is put on one area than another it will dry longer and therefore darker. It is critical to add the same amount of water to the same panel. If one side is in the shade and never receives sun then minor moist curing is needed. The panels that will dry quickly should be moist cured with the most water.  If the homeowner knows to do this then he or she will probably care more about doing a proper job. It is better to not moist cure the final coat if care is not taken to do the job right. Adding water keeps the moisture in and the shrinkage cracks from appearing. So the next time you start seeing the small little cracks in a new wall either ask when you can add water to the wall or stand more than five feet from the area.

Monday, January 10, 2011

Efflorescence

This is the second rainiest December in recorded history in Southern California. For those of us in the stucco business lots of rain can only mean one thing: EFFLORESCENCE!
This is the white powdery material we see on concrete, masonry, stucco and other substrates that are naturally high in alkaline. Usually about a week following the rains I get quite a few calls from builders and homeowners letting me know that “the lime is coming out of the stucco”! I patiently explain that these are naturally occurring mineral salts that are present in plaster, cement, stucco, mortar, stone, soil, water, and many other materials used in construction. In some cases the efflorescence can manifest itself as a “bloom” of white calcium carbonate and have a crust. The water soluble salts liquefy and as the wall dries the water migrates to the surface carrying the salts. The water turns to vapor and evaporates leaving the salts on the surface in the form of efflorescence.  We see it most often in new construction where the salts are in higher concentrations. But efflorescence can occur over time as long as the salts are present and the conditions exist for them to migrate to the surface. Slower evaporation also tends to allow more salts to come to the surface and obviously large amounts of rain exacerbate the condition. The good news is that these salts can be neutralized. Since these salts are by nature extremely high PH it is logical that a low PH solution (an acid) should be used to neutralize it. On a smooth wall or masonry you can use a soft brush and a mild solution of white vinegar and water to kill it. On tougher staining or textures that can be damaged by scrubbing then a stronger acid solution can be used. Be extremely careful however, acid can etch glass, kill plants and is very caustic and hazardous to use. One method for removal is to dry brush the calcium off and then flush the area with water.  This seems counter intuitive to add more water but since there is a finite amount of salt it does work. After cleaning a sealer can be used to stop water. Merlex’s Micro Seal is an excellent chemical for stopping water.  If the water cannot get into the wall it can’t carry the salts back out. So the next time it rains just get out the vinegar and don’t blame it on the lime!

Tuesday, January 4, 2011

Cracking In Exterior Stucco


Having been in the construction industry for over thirty years and at Merlex for close to eighteen I am usually asked the same questions over and over. Through the years I have written letters explaining certain conditions and tend to use the same ones for similar circumstances. There are published reports and industry associations from which I have drawn much information and technical data.  I have sold lath and plaster, drywall, metal studs, masonry and related tools and aggregates that have given me much experience in the construction of walls and ceilings. I have consulted on structural issues, fire ratings, and water intrusion problems. I now feel uniquely suited to answer questions and offer solutions about frequently asked questions regarding stucco, plaster systems and the building envelope. I hope that I can have some lively discussions and learn a few things both locally and within other regions about stucco and related products and issues.

Topic #1   Cracking in exterior stucco

The single most discussed topic in Portland cement stucco is cracking. I have spent countless hours and many thousands of miles looking at cracks which don’t seem to change much over the years.
No one can guess how much the stucco will crack in your home, building etc. There are many reasons for cracking none having anything to do with the quality of material, level of workmanship or knowledge of the builder. It does have everything to do with how much the structure moves. All the variables for structural movement are in play including geological conditions, wind shear, movement and shrinkage of framing members, weight on the building envelope (walls) seismic activity and any other cause of stress to the building.  It is advisable to discuss this at length with your structural engineer, architect and general contractor before proceeding with the plaster and stucco. There are certainly some technological advances in the plaster system that can reduce (not eliminate) the incidence of structural cracking. The base and mesh system is the newest and most effective solution to significantly reduce the incidence of cracking. This is an additional coat of material consisting of a polymer modified base coat with an embedded fiberglass mesh for added reinforcement. The benefit is twofold: The first is the modification of the additional cement with polymer to allow for some movement or elasticity in the material. The second part of the system is the mesh that works as a slip joint to arrest cracks that emanate from some underlying stress. You can find more specific information on the Merlex site on the technical bulletin for Basex and the Basex frequently asked questions sheet.
I hope that I hear from industry experts, product reps, or other areas with some novel solutions to this old problem.